Monday, September 27, 2010

Light Up Your Day - with Fabric!

Remarkable Holiday Madness Blog Tour - Day 3

When I first heard about the fabric that was added to our product line I was excited, and nervous.  I am a crafter.  I love stampin' but I also love sewing, quilting, needle work, you name it!  I have dabbled in almost all things craft. However, how could I use this new product line in my business without dragging my sewing machine to a hostess party? Well....I often carry a quilting square given to me as a thank you gift from Stampin' Up! employees at the warehouse (I'm not the only one who got one).  But today's tour shows one of my first fabric projects . . . and tomorrow you'll see my 'house' of fabric!


 I started with this little night light I bought a long while back in the discount section of a local store.  I had every intention of changing the cover but never could find the right look . . .

Well....when I saw the fun fabric from the Holiday Mini Catalog, Deck the Halls (page 16) I was sure I was going love the style (I love 'old world' stuff).  So here's what I did with it.


I use the pink cowboy fabric as my pattern and the adhesive, my favorite heavy duty guy - Stick Strip (IB&C page 197).  I put the tape on the edges of the fabric.  The Crochet ribbon (Victoria - IB&C page 190) & 1/8" Taffeta (page 191) were added afterward with mini glue dots.  It's been over a month and it's holding up without any problems!  I love it and I think it goes with my plans for a French Country makeover in my bathroom!

What do you think?

I hope you will continue the tour and stop back here tomorrow to see what's next!


Sunday, September 26, 2010

BINGO!

 RemARKable Holiday Madness Blog Tour - Day 2

I love this fun Bingo Card (Holiday Mini Catalog page 30) stamp and I have seen some adorable cards created with it, however . . . 


       . . .  I wanted to stay true to what it is....a Game!  So I thought about what events this could be customized for and I created just a few of them for you.  There were a variety stamp sets and colors used to create them so if you are interested please email/call me for that information.

A Birthday Party - I chose a child's version, but it could be adjusted for every age and every party (as long as your guests are not 'too cool' to have fun!)


A Valentine Party for kids or adults with this version:
Plus I like the little hearts I punched out to cover the squares!
 
For the customized cards you would need to make drawing squares of each symbol, or letter, in the game and just draw them out of a box (OH....I just thought of a fun idea for the box too...not time, gotta post for this tour. I'll post it later).
...but if you do a Christmas Bingo (shown below), why not just use the wood mount version of the stamps set Jolly Bingo Bits (Holiday Mini Catalog page 29) and draw them out the box!


 Some other ideas for this game:  If the word has less than 5 letters you could add a symbol like the I did in the Love sample, or squeeze letters together in one square like A-N-I-MA-LS.

Plants- with different plants in each square, great for a garden club party or meeting.
Religion - People or events (Jesus has two s's you could put a symbol of heart or a cross with the 2nd one), or put a scripture reference in each square and if you have that you read the scripture to the class.
Teaching tool, like the Animals example above with photos on the squares.
Personalize to your family's favorite place or events with the word PLACE at the top or you last name, like SMITH.  This is a great game for family night fun! 
Names: 5 letters is perfect like Diane,or more than 5 double up on letters like SH-A-R-O-N.  If it has double letters put them together in one square like B-O-BB-Y (symbol).

I think you get the idea....this stamp has E-N-D-LE-SS possibilities!  I'd love to have you share your ideas with me...drop me an email with a photo and I will share you sample on my blog showing everyone how creative YOU are!

I hope you enjoy today's tour....see you back here tomorrow!


Saturday, September 25, 2010

Roll Out The Christmas Trees!

WOHOO!  Another Blog Tour Begins!

This will be a first for me, posting 7 consecutive days in a row.  WAIT!  Oh No!  Don't faint!  Do need some water?  Get back in your chair, now, are you OK?  Good...let's get started then . . .

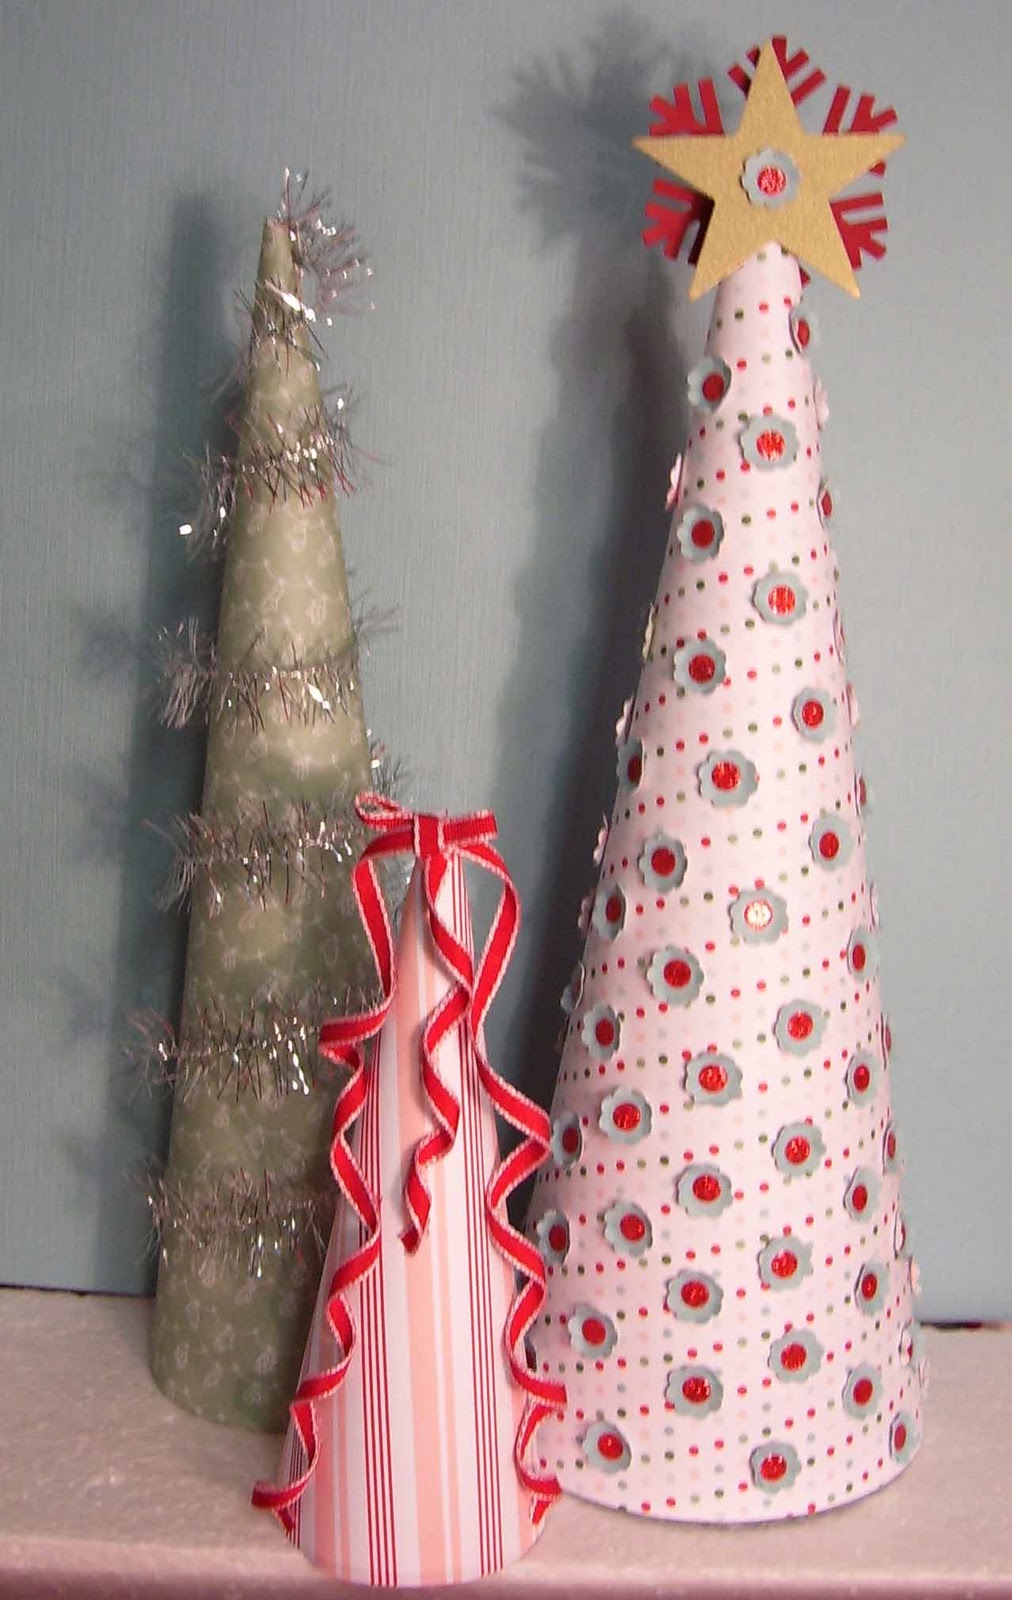
Since the theme is Holiday Madness, I decided to start out with something simple, but fun.   These little trees range from 5 inches to slightly more than 9 inches.  The Paper is from the Holiday Mini Catalog, page 33, Specialty Designer Series Paper - Candy Cane Christmas. 


I don't know if you can tell, but the red dots on the tallest tree have glittered centers.  This is part of the paper as you can see the bottom photo.  I just punched them out with the flower shape from the Itty Bitty Shapes Punch Pack (Idea Book & Catalog [IB&C] page 201).  I glued them on with Mini Glue Dots (IB&C page 197).  The star (XL punch IB&C page 203) is made of Brushed Gold card stock (IB&C page 170) & the Snowflake (XL punch IB&C page 200) from Real Red card stock (page 166).  The ribbon is 1/8" Taffeta in Real Red, I used glue dots to hold down the 'curl' in strategic areas.  The 'garland' is actually only touching the paper in the back where it's held in place with Mini Glue Dots (don't you love those little things?)  It's the Silver Tinsel Trim from the Holiday Mini Catalog, page 21)

The photo below shows how what I did to get the little flowers....you can get a LOT of flowers from one piece...I barely used three rows with very, very, little waste - seriously, you can punch out EVERY full dot!  WOW!  I did curl the edges of the flowers too.


Hope you enjoyed this simple and quick project(s)  for you Holiday decorating.  Click the link below to move through the other RemARKable Demonstrator blogs until you get back home to me.  Watch for my next blog tomorrow!